Goodbye Cold Floors: Radiant Floor Heating Options You Can Add Room by Room
Radiant floor heating isn’t just for luxury homes. Learn the main options, costs, timelines, and where it makes sense—one room at a time.
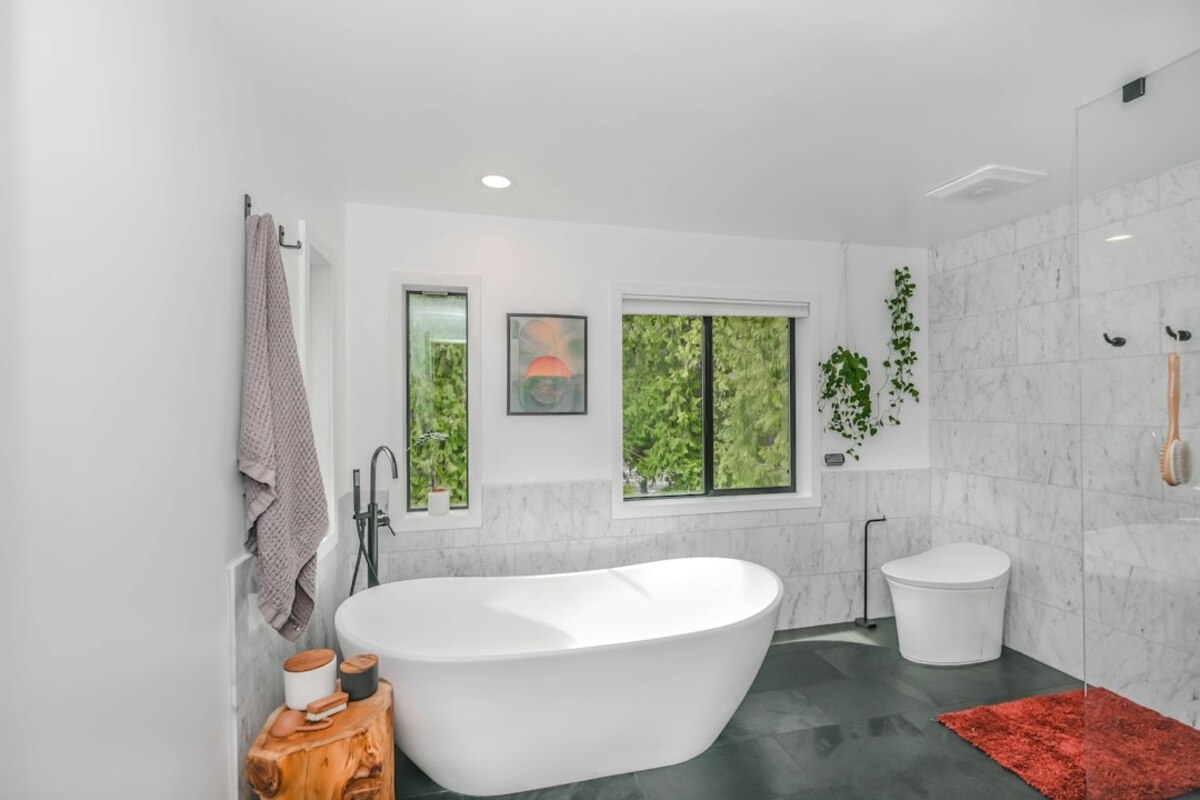
- You can add radiant floor heating in targeted rooms (like bathrooms) without remodeling the whole house.
- Electric mats are simplest for small spaces; hydronic systems shine in larger areas but cost more to install.
- Floor type, insulation, and thermostat choice matter as much as the heating system itself.
Why heated floors feel so different (and why people get hooked)
Most homes rely on convective heat: warm air blows out of a vent or rises from a baseboard heater, then drifts around the room. That works, but it also creates familiar annoyances—cold feet, hot ceilings, chilly corners, and that “why is the thermostat set to 72°F but I’m still cold?” feeling.
Radiant floor heating flips the experience. Instead of warming the air first, it warms the surfaces you live with—especially the floor. Think of it like standing near a sunny window on a winter day: the air might be cool, but you feel comfortable because your body is soaking up radiant warmth.
A common real-life scenario: it’s a weekday morning, you shuffle into the bathroom half-awake, and the tile is so cold it instantly wakes you up—in the worst way. Radiant heat aims to turn that moment into a non-event. You step out of the shower and the floor feels gently warm, not “hot,” not noticeable as a device—just comfortable.
What’s especially renovation-friendly is that you don’t need to commit to the entire house. Many people start with one room (often a bathroom), see how it feels, then decide whether it’s worth expanding later.

The main types you can actually add during a renovation
There are two core approaches for radiant floors. One runs on electricity, the other runs on hot water. Both can be added during a renovation, but they differ in cost, complexity, and where they make sense.
| Option | How it works | Best for | Typical renovation fit | Watch-outs |
|---|---|---|---|---|
| Electric radiant (mats or cables) | Thin heating wires warm the floor when powered | Bathrooms, kitchens, entryways, single rooms | Ideal for one-room upgrades; often installed under tile | Electricity cost varies; needs dedicated circuit in some cases |
| Hydronic radiant (hot-water tubing) | Warm water circulates through tubes under the floor | Larger areas, whole floors, new additions | Best when floors are already being rebuilt or in major remodels | Higher upfront install complexity; needs a heat source (boiler, water heater, etc.) |
Electric radiant: the “weekend-renovation-friendly” favorite. Electric mats are popular because they’re thin, predictable, and straightforward for contractors to plan around. In a small bathroom, for example, installers can often fit a mat around the open walking areas (not under the vanity base) and connect it to a thermostat on the wall. Many systems are designed specifically to sit beneath tile or stone.
Hydronic radiant: the “serious renovation” solution. Hydronic systems are often the choice for larger spaces because they can be efficient at scale. Instead of paying for electric resistance heat, you’re moving warmth from a heat source (like a boiler) into the floor via water. But retrofitting hydronic tubing can be more invasive—often involving subfloor work, manifolds, and careful planning so the floor height doesn’t create awkward transitions.
There’s also a practical third category you may hear about in renovation conversations:
- Floor-warming vs. space-heating: Some systems are designed mainly to make the floor feel nice (common in bathrooms). Others are engineered to meaningfully heat the whole room. The difference is usually in output, insulation strategy, and thermostat controls.
If you’re not sure which camp you’re in, imagine two goals:
- “I want warm tile under my feet.” This usually points to electric mats or cables in a targeted area.
- “I want to reduce how often my furnace runs in this zone.” This pushes you toward a more engineered approach (sometimes hydronic, sometimes a higher-capacity electric design), plus better insulation and temperature control.
Planning it room by room: what matters more than brand names
Radiant floor heating gets sold as a comfort upgrade (and it is), but during a renovation the real success factors are less glamorous: floor build-up, insulation, thermostat strategy, and where the heat is allowed to go.
1) Floor type: tile is the easiest win. Tile and stone are excellent at transferring heat. That’s why bathrooms are the poster child for radiant floors. But you can also install radiant systems under other surfaces—engineered wood, vinyl, laminate, even carpet in some cases—if the product is rated for it and the temperature is controlled properly.
Think of heat moving through floors like a conversation through walls: some materials “speak” heat clearly (tile), others muffle it (thick carpet). If you want quick response and strong floor warmth, hard surfaces generally perform better.
2) Insulation and “heat direction”: Heat will travel to wherever it’s easiest. If there’s poor insulation below the system—say, an uninsulated floor over a garage or crawlspace—your radiant setup can end up warming the wrong place. That doesn’t just reduce comfort; it can waste energy.
In plain terms: you want the heat to go up into the room, not down into a cold cavity. During renovations, this may mean adding insulation under the subfloor or using an approved underlayment that improves upward heat transfer.
3) Floor height and transitions: Many renovations fail on the small stuff. A radiant layer plus thinset plus tile can raise a floor enough that a door rubs, a threshold feels odd, or a hallway transition becomes a toe-stubber. Good installers plan for this early.
If you’re doing one room (like a bathroom) next to an existing hallway, ask how the edge will be handled. Sometimes the solution is a tapered transition strip; other times it’s adjusting underlayment thickness or choosing a system with a thinner profile.
4) Thermostat strategy: schedule beats guesswork. People often imagine radiant floors as instant heat. In reality, response time depends on what’s above and below the heating element. A tile floor with a well-designed system can warm reasonably quickly, but many setups still benefit from a schedule.
A simple routine can make radiant heat feel “magical”:
- Warm the bathroom floor before wake-up time.
- Let it drop during the workday.
- Bring it back up before evening showers.
This is also where floor sensors matter. Many thermostats can monitor floor temperature directly, preventing overheating and helping protect certain floor materials. It’s like having a thermometer in the floor instead of guessing based on the air.
5) Where you place the heating mat/cables: More isn’t always better. It’s common to avoid placing heating under fixed cabinets or vanities (unless the system and installation plan explicitly allows it). The goal is to warm the walking zones where you’ll actually feel it.
Picture a small bathroom: you stand at the sink, step out of the shower, and move around the toilet area. Those are the squares that matter. Heating under a built-in vanity base can be like turning on a seat warmer while sitting on your coat—less effective than you’d expect.
6) Electrical planning (for electric systems): Electric radiant heat is often simple, but it’s not always “plug and play.” Depending on the square footage and wattage, your system may need:
- a dedicated circuit,
- GFCI protection (common in bathrooms),
- space in your electrical panel,
- a thermostat location that makes sense (and isn’t blocked by a door swing).
This is one reason radiant floor heating is easier during renovations than after: the walls may already be open, and the electrician can plan clean routing without patchwork.
Sometimes, but not always. Many bathroom installations are designed primarily as floor-warming, not the only heat source. In larger rooms or well-insulated spaces, radiant floors can contribute significant heat—but whether they can fully replace a furnace/baseboards depends on room size, insulation, floor material, and system output.
Sometimes, but not always. Many bathroom installations are designed primarily as floor-warming, not the only heat source. In larger rooms or well-insulated spaces, radiant floors can contribute significant heat—but whether they can fully replace a furnace/baseboards depends on room size, insulation, floor material, and system output.
Most properly set-up systems feel gently warm, not hot. With a floor sensor and the right thermostat settings, you can avoid overheating. The goal is comfort—more “sun-warmed sidewalk” than “heated blanket on high.”
Most properly set-up systems feel gently warm, not hot. With a floor sensor and the right thermostat settings, you can avoid overheating. The goal is comfort—more “sun-warmed sidewalk” than “heated blanket on high.”
It can work well, but you must match the system to the flooring manufacturer’s requirements. Some floors have temperature limits and installation rules. This is where a floor sensor, correct underlayment, and a product rated for your floor type make the difference between “cozy upgrade” and “warranty headache.”
It can work well, but you must match the system to the flooring manufacturer’s requirements. Some floors have temperature limits and installation rules. This is where a floor sensor, correct underlayment, and a product rated for your floor type make the difference between “cozy upgrade” and “warranty headache.”
A realistic timeline expectation: If you’re renovating a bathroom, radiant floor heating is usually folded into the normal sequence: subfloor prep → system install → sensor placement → thinset/self-leveling layer (if required) → flooring installation → electrical hookup and thermostat. The time impact varies, but the key is coordination—your tile installer and electrician have to agree on the plan.
Budget expectations (without pretending every home is the same): Costs vary widely by room size, labor rates, electrical readiness, and floor choice. But the pattern is fairly consistent:
- Electric systems: often cost less upfront and are easier to add in one room.
- Hydronic systems: often cost more to install but can make sense for larger square footage or major renovations.
Where it makes the most everyday sense:
- Bathrooms: the comfort upgrade is immediate and obvious (especially with tile).
- Kitchens: great if you stand and cook a lot, though install area can be limited by cabinets and appliances.
- Entryways/mudrooms: a cozy first step inside; can help floors feel less damp in cold seasons.
- Home offices: surprisingly nice if you sit still for long stretches and your feet get cold.
Questions worth asking your installer before you commit:
- Is this design meant for floor-warming only, or to contribute meaningful room heat?
- What’s going under the heating system to encourage heat upward (especially over unheated spaces)?
- How will you handle floor height changes at the doorway?
- Will the thermostat use a floor sensor, an air sensor, or both?
- What parts are serviceable later, and what’s buried permanently?
Radiant floor heating is one of those renovation choices that’s hard to appreciate from a spec sheet. But in daily life, it’s simple: fewer cold-floor moments, less “blast the heat” frustration, and a room that feels comfortable in a quieter, more even way.